You need help to install an inflatable pipe plug ?
In this article, we suggest you discover the best practices through 4 steps to install this product safely:
1- Check the condition of the inflatable pipe plug
2- Check and prepare the pipe
3-Install and secure the inflatable pipe plug
4- Dismantle the product safely
STEP 1: Check the condition of the inflatable pipe plug
First, make sure you have chosen the right inflatable pipe plug for your application.
Before you even begin installing the inflatable balloon, you need to check that it is usable. So first, check that its surface is not torned, cut or damaged. This can happen if the product is not well maintained. However, if you take care of it, it is unlikely that you will have any problems! Next, consider cleaning the product.
After the surface, we move on to the efficiency of the product: always check the inflation hoses, control and safety instruments thoroughly. If necessary, replace them. Do not hesitate to contact us!
As a reminder, “Before any intervention or repair on the obturator, consult us. Any intervention without PRONAL’s agreement will cancel any manufacturer’s warranty.”
Then, before any connection, you must check that the inflation nozzle is clean.
You can carry out a pre-installation test by inflating the obturator to a maximum of 0.2 bars outside the pipe and by brushing it with soapy water: If you see bubbles appearing, there is a sealing problem. In this case, contact us.


Step 2: Check and prepare the pipe
To begin with, the pipe should be checked for cleanliness, so as not to affect the watertightness or reduce the resistance to back pressure.
We recommend that you clean the pipe with a high pressure water jet, wire brush or robot.
Next, you must ensure that the temperature and type of flow is compatible with this inflatable. As a reminder, as a standard, our inflatable balloons resist temperatures from -10°C to 70°C.
As required by local regulations, your teams must be equipped with Personal Protective Equipment (PPE).
Very important step: safety. You must make the intervention site safe, by installing the safety equipment required by the standards and laws of the intervention area.
Please note that each country has its own regulations concerning work in confined spaces when installing plugs in pipelines, so it is important to refer to them.
Step 3: Install and secure the inflatable pipe plug
The entire length of the product should be inserted into the pipe: no part should remain uninflated or protrude from the pipe.
This product should be positioned at least one diameter away from the end of the pipe.
Caution:
NEVER use the plug on surfaces that are too abrasive or sharp
NEVER place any foreign object between the pipe wall and the product
Next, connect the inflation hose to a compressor or foot/ hand pump.
First, pre-inflate the product to the pipe wall and check that it is in the correct position.
If the stopper has a handling accessory: it must be secured before inflation from the handling ring for easy recovery after use.
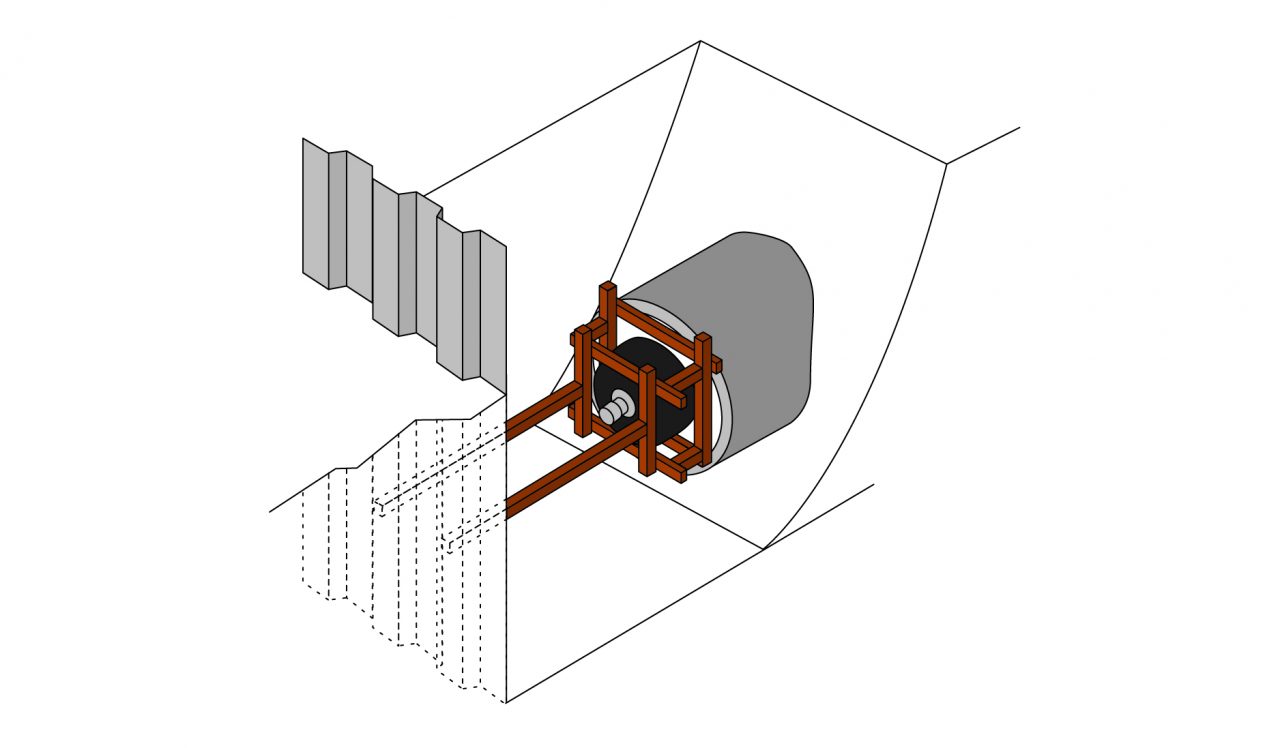
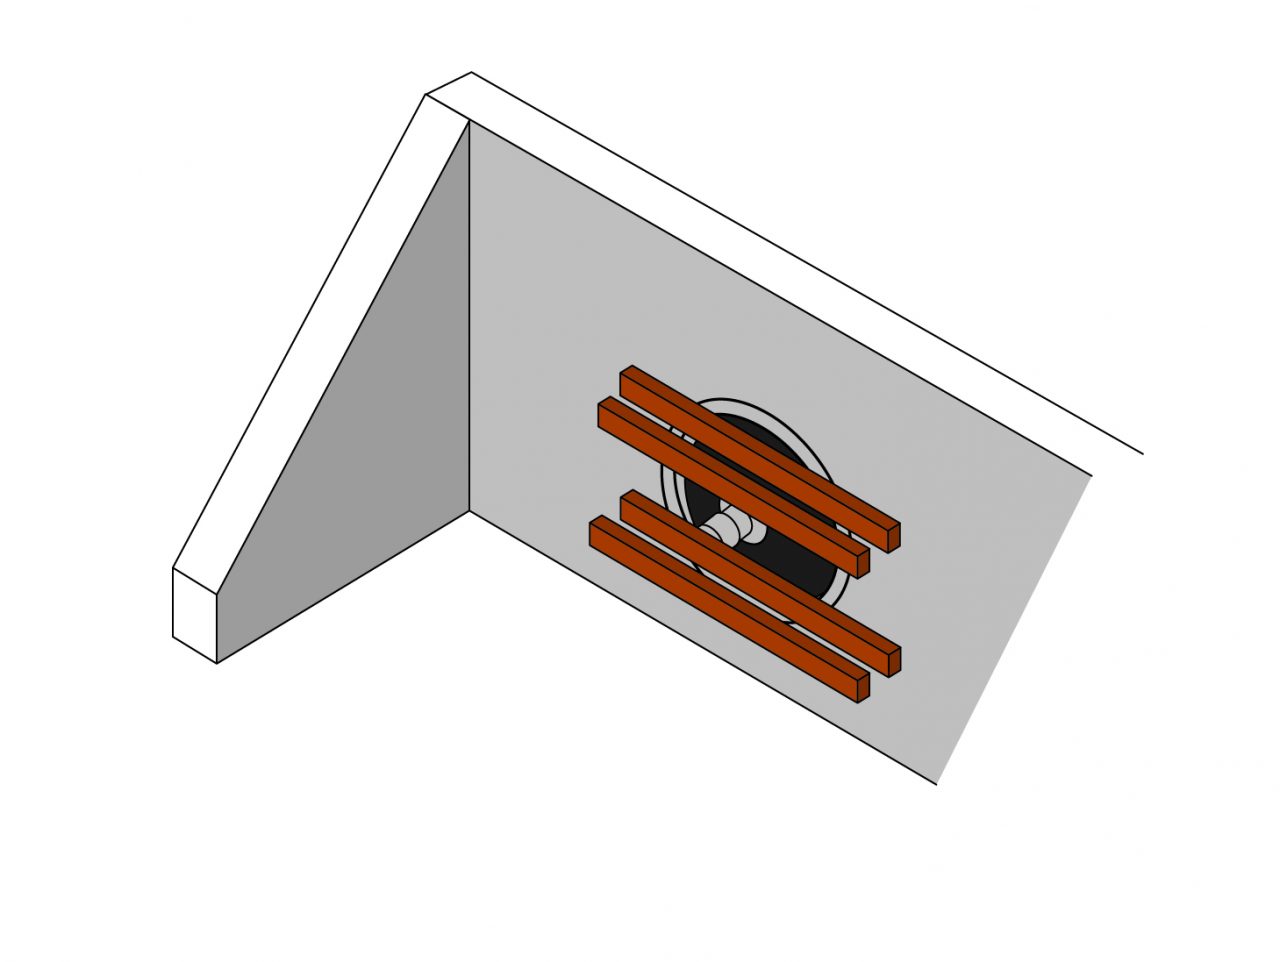
You will now install a holding system for the inflatable balloon to ensure its position:


Before inflating the product, for safety reasons, Make sure that no one is in the pipe during maintenance: there is a risk of serious injury if the inflatable balloon is ejected.
Make sure that you stay away from the shutter and that you do not stand in the axis of the pipe during its use and during the inflation and deflation phases. -> To do this, make sure you have a hose long enough not to be in front during the operation.
Now increase the pressure slowly and carefully to its maximum.
Finally, constantly check the pressure values.
Step 4: Dismantle the product safely
Once your maintenance is complete, you can safely remove it.
To do this, release the back pressure on the plug using the cross wall or other access to the pipe.
Then, you can dismantle the holding systems in place.
Empty the balloon of its air content through the filling hose until it is completely empty: NEVER try to pull the inflatable pipe plug out of the pipe before it is completely deflated.
Finally, you can pull it out of the pipe with a rope or cable attached to the product ring. NEVER pull the inflation hose out.
We hope that these steps will be useful to you when installing these inflatable balloons. We remind you that PRONAL also offers a service: a team of shock that comes to help you and install the shutter system to make your work even easier. Do not hesitate to contact us!
You can discover other tutorials for the use of our products such as the lifting cushion!